|
|
| AutoMate |
|
|
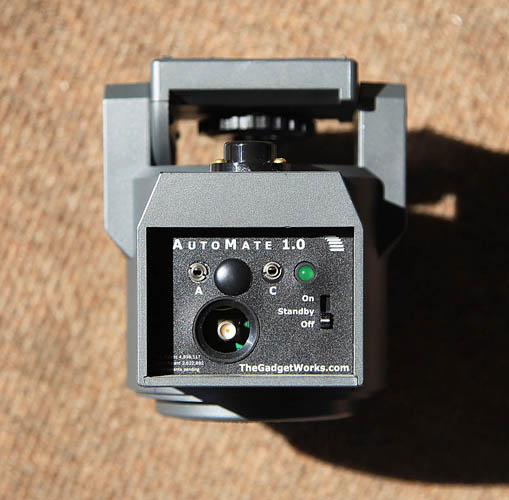
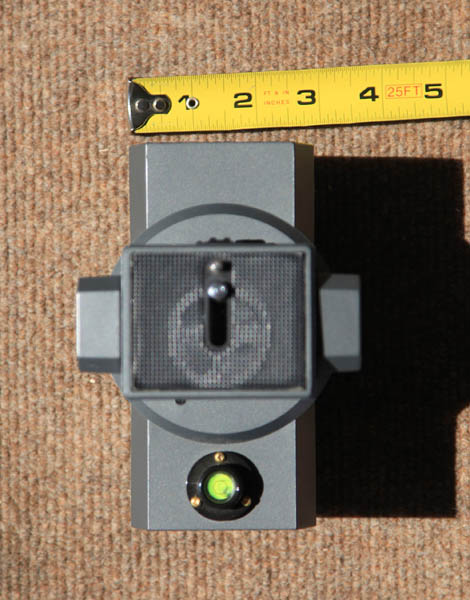
Front panel of AutoMate
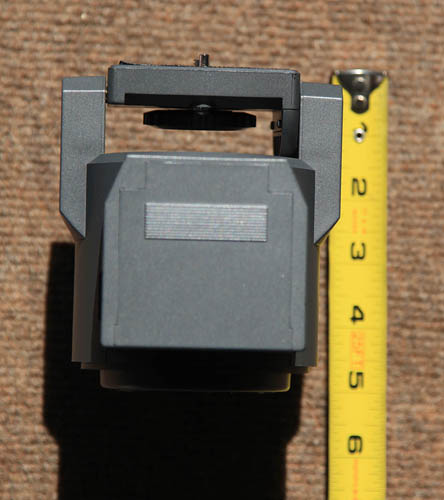
Rear view of AutoMate
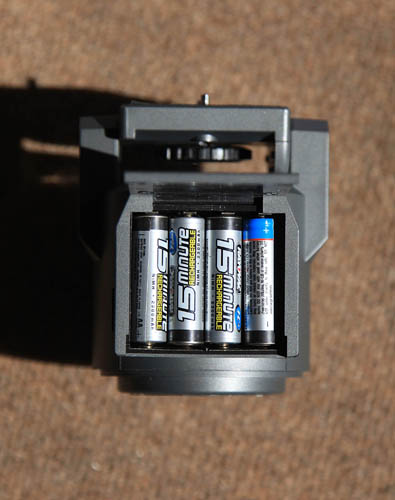
AutoMate battery compartment
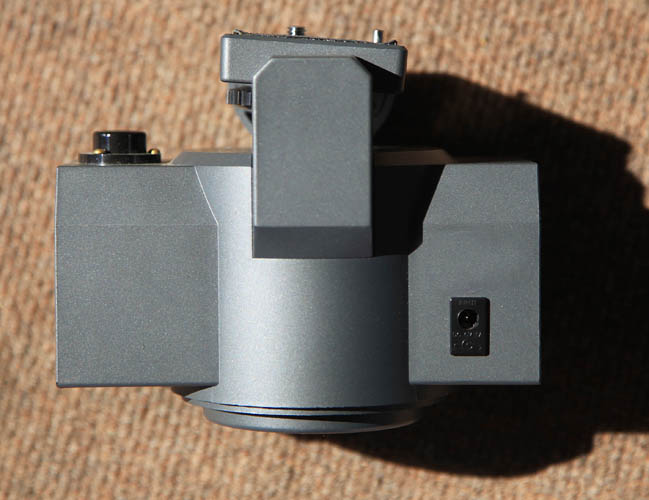
Side view of AutoMate showing power socket
Side view of AutoMate showing degree scale
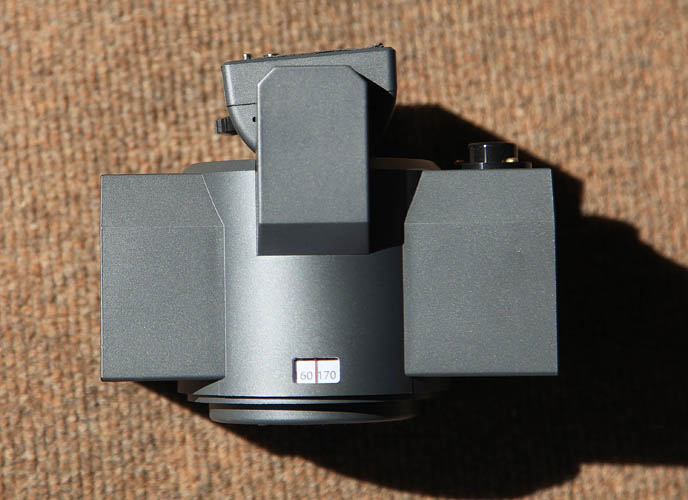
Top view of AutoMate
AutoMate integrates all of the following in a small lightweight package:
- A programmable robotic camera platform
- A remote control tripod head
- A gigapixel panorama generator
- A programmable electronic shutter release with both full-press and half-press control
- A programmable intervalometer that can run complex custom programs
- A moving time-lapse movie generator
- A programmable self-timer that can run custom programs
- A remote control for operating the robot and activating the half-press and full-press shutter release
- Two input lines for sensing external trigger events and running custom programs in response
- A custom program editor
- A database of user settings and custom programs
AutoMate consists of a robot that you control and program with your own hand-held
PDA or cell phone. The PDA or cell phone runs Windows Mobile and our special AutoMate software.
The robot supports camera and
lens combinations weighing up to 6 pounds, making it ideal for digital SLRs with heavy lenses. The AutoMate
software is graphical in nature and extremely powerful and versatile. You can use the hand-held to
directly control the motors and the shutter release or you can use it to create programs that you
send to the robot. When you send a program to the robot, it saves the program in its memory.
The robot can either run the program immediately or it can run the program later. When you send an intervalometer (time-lapse)
program, the robot runs the program at every interval. When you send a self-timer program, the robot runs the program
when the timer runs down. When you send a trigger event program, the robot runs the program when it senses the trigger event.
There are two trigger events, so you can send different programs for each trigger. The programs remain in memory even after turning
the robot off.
Although the most likely use of AutoMate is with a camera, you can mount anything on the robot that you choose,
such as a telescope or search light or CCTV camera. You can even use AutoMate to build your own remotely-controlled inventions.
Your imagination is the only limiting factor.
The panorama feature
The panorama feature of the AutoMate suite tells the robot how to shoot a series of overlapping photographs in a collection of columns and rows. You set a few simple parameters on the
panorama input screens that describe your equipment, some custom timing values, how much you want each image to overlap the next, if you want to shoot a set of bracketed exposures and what kind of bracketing you
want to use.
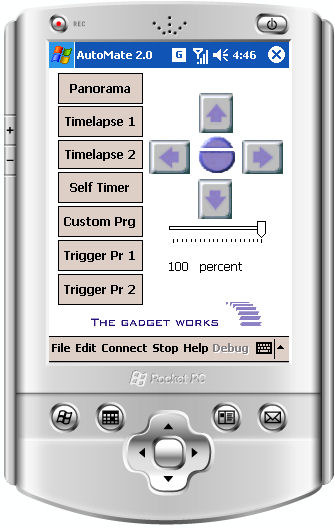
The Windows Mobile App
The following screen is the front screen for the app
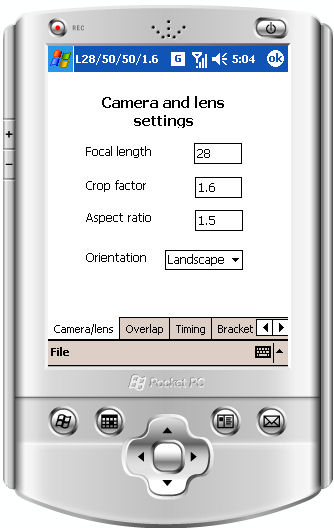
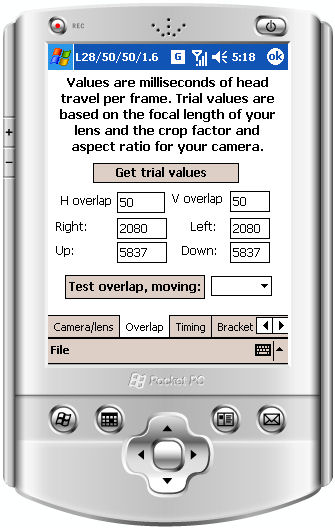
The following screen is for setting the camera and lens parameters:
The following screen is for setting the overlap and the motor speeds:
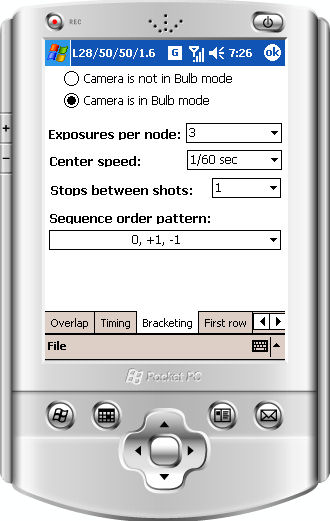
The following screen is for setting the bracketing parameters:
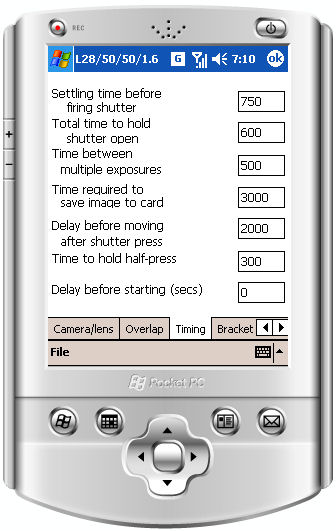
The following screen is for setting the timing parameters:
You don't have to set these values every time you take a panorama. The program always remembers the last settings you used and restores them anew when you restart the program. But you can also
save settings by name and restore them at any time. So for example you might use various cameras and lenses at different times. You simply save the settings you create the first time you
use that camera and lens and recall them every time from then on. The same is true of the overlap, timing, and bracketing settings.
The bracketing feature is especially nice if you are interested in HDR (high dynamic range) photography. But it is also useful for doing panoramas at night, as the exposure time can
be set to very long time periods.
Once the parameters are set to your liking, you are ready to shoot a panorama. You need to tell the program how many frames there are in a row but the simplest way possible to do
this is to point the camera at one corner of the scene you want to photograph and tell the robot to start shooting the row. When it reaches the far end of the scene, you simply tap Stop
and it knows how many frames are in a row and uses that value for all subsequent rows. It has also just finished the first row for you. Of course, the robot automatically fires the camera at every frame along the way.

From this point on, you shoot one row at a time by simply tapping Shoot a row. When you tell the robot to do anything, such as shoot a row, the PDA sends it a program that it stores in its internal memory and then
runs the program without need to be in contact with the PDA. However, you can also interrupt the process at any time by tapping a Stop button that sends a special command to the robot that tells it
to suspend whatever it is doing and wait for further commands. At this point you can tell the robot to either resume the program or terminate it.
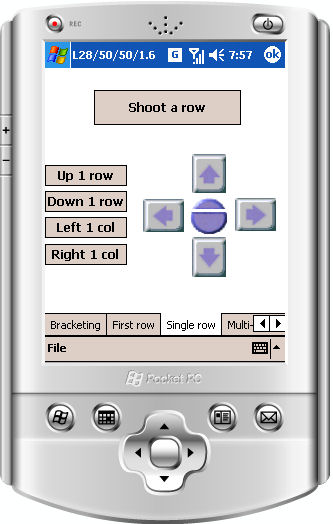
The directional buttons that are on this and the home screen are for adjusting the position of the head. You can tilt and pan to any location. There is a 360 degree scale on the bottom of the robot that
helps you reposition the head to the same horizontal location every time. The other four buttons are for moving a single column or row at a time. The program knows exactly how far to tell
the robot to move in order to increment to the next row or column. The larger of the two buttons in the center of the arrow buttons fires the shutter. The smaller of the two is a
"half-press" button. It performs the same operation that the half-press does on your camera, which can usually be used to wake the camera up from a "sleep" state and/or to activate the
auto-focus operation.
The time-lapse features
A time-lapse sequence is a series of photographs taken at regular intervals and later combined into a speeded-up movie. Classic examples of time-lapse movies are
a flower opening and the progress of the construction of a building. These two examples are typically made with a fixed camera that does not move or rotate.
Photographers spend hundreds of dollars on a device called an intervalometer to make these sequences. Another kind of time-lapse movie made with a still camera is
one that pans across the scene while the time passes. AutoMate has both kinds of features, each with its own set of controls.
The AutoMate time-lapse feature that is most like a traditional intervalometer is much more powerful than any intervalometer to date. It has the ability to
set intervals of seconds, hours, or even days, with the upper limit being thousands of days. You can set when the sequence starts and when it ends, even months in the future.
You can also tell the robot
not to take photos during a particular time of the day, such as at night for example.
You can tell the robot to take one or more exposures at every interval, and to send an optional wake-up signal to the camera. You can even create a custom program
that the robot executes at every interval. The custom program can do virtually anything that the robot can do and in any order and for as many times and for
however long you want it to.
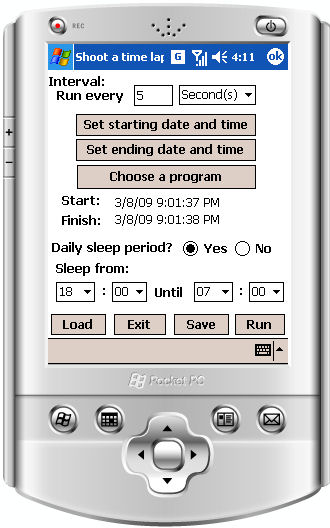
The following screens describe the first time-lapse feature.
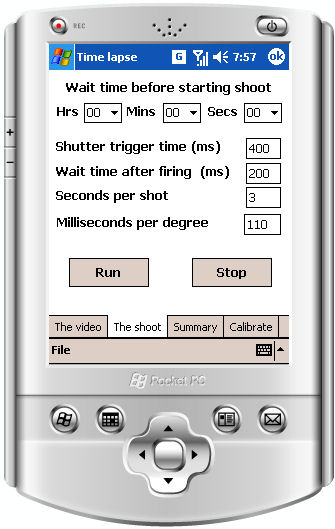
The following screen is for setting up the basic parameters of the first type of time-lapse:
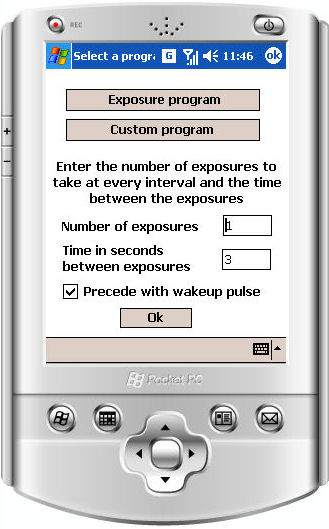
The following screen shows the setup for the program you want to execute at each interval:
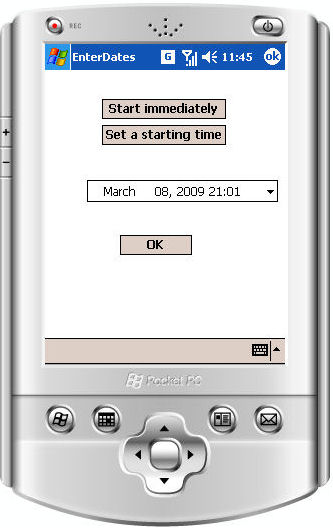
The next two screens show the setup of the starting time and ending time of the time-lapse sequence:

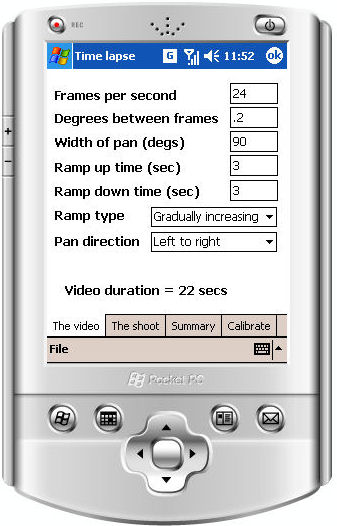
The second time-lapse feature is completely different, designed to create panning time-lapse movies. You might call them time-lapse panoramas. The setup for a time-lapse panorama
is quite different from that for the first type of time-lapse. The idea of this feature is to first describe the movie that you want to make. You define the frames per second,
what kind and how long the ramp up and ramp down sequences should be, how many degrees to pan during the movie, how many degrees between frames, and which direction to pan. At the moment you can only define
horizontal motions but in the future you will be able to combine vertical and horizontal motions in the pan sequence. After defining what the movie should look like, you then
define the characteristics of the shoot. These specifications include how often to fire the shutter, how long to wait after and before moving the head, how long to hold the shutter open,
and how long to wait after sending the program to the robot before initiating the sequence.
The following screen shows the definition of the movie:
The following screen shows the definition of the shoot:
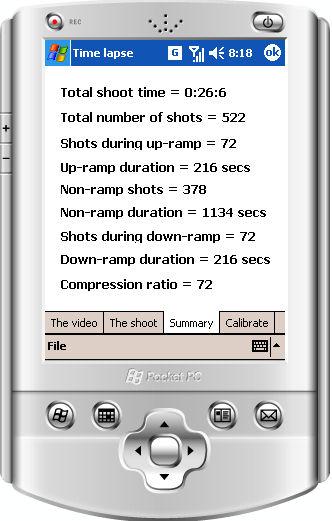
The following screen shows some summary information:
The self-timer feature
What would an all-purpose photography gadget be without a self-timer function? Well, like all the other features of AutoMate, this self timer is not your father's self-timer. It incorporates the
ability to set the delay in seconds, minutes, hours, and even days, up to years in the future. And when it does arrive at the time to act, it can either take one or more photographs
with a programmable time delay between them, or it can run a custom program of your own creation that can do virtually anything that the robot is capable of.
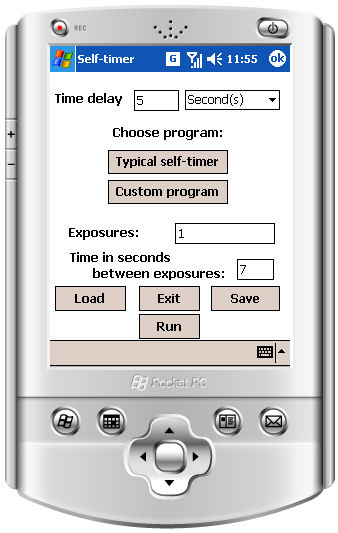
The following screen shows the basic setup of the self-timer:
The trigger feature
Have you ever wanted to capture the elusive snow leopard but just couldn't stand the idea of waiting in the Himalayas for months on end to spot one? Well, now you can use AutoMate
to do the waiting for you. AutoMate has two input lines that, upon coming into contact with the third line, trigger the execution of a custom program of your own creation. You can use any
kind of sensor you want to create the trigger signal. It can be a motion detector, a noise detector, a light beam interruption, a vibration sensor, or anything that can be made to close
a contact between two wires.
The same
custom programming language is used for all the custom program features that you can use with AutoMate, including the first time-lapse feature and the self-timer. You can also create
and immediately execute a custom program. It does not have to be triggered by something else.
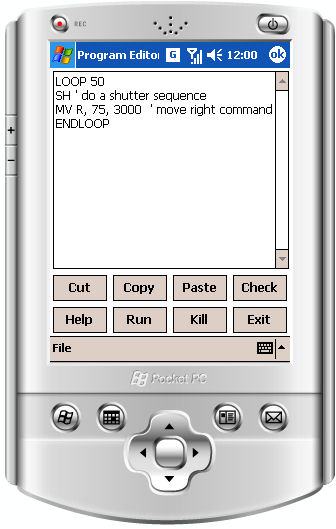
The following screen shows the custom program editor:
|
|
|
|

